For this project we made our robot art designs. We started out doing simpler tasks at the beginning and progressed onto harder tasks that have to do with electricity.
Packet 1:
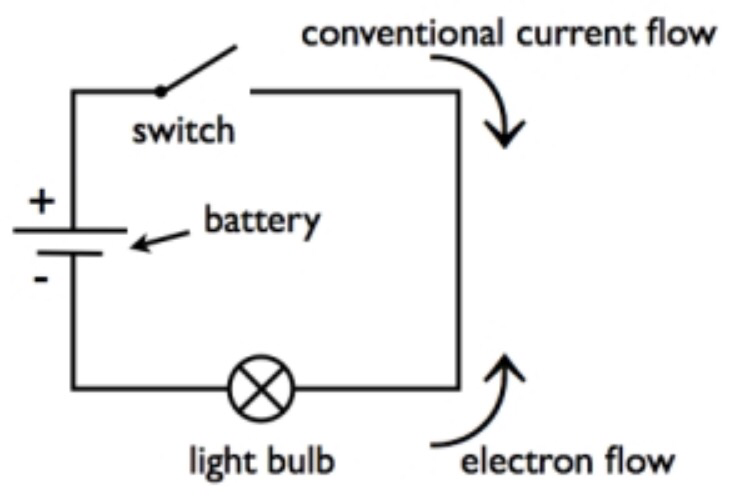
To start is off learning about electricity, we completed a packet. This packet thought is the basics of how electricity flows and works in general. We made different circuits that did things like turn lights on, make noises, and more. It taught us how to draw and make circuits. We learned about voltage(v) which is how much energy there is, circuits which are a complete and continuous loop of electricity. We also learned about resistance(r), the energy that opposes the flow of electricity and current(i), the flow of electricity through a circuit
To start is off learning about electricity, we completed a packet. This packet thought is the basics of how electricity flows and works in general. We made different circuits that did things like turn lights on, make noises, and more. It taught us how to draw and make circuits. We learned about voltage(v) which is how much energy there is, circuits which are a complete and continuous loop of electricity. We also learned about resistance(r), the energy that opposes the flow of electricity and current(i), the flow of electricity through a circuit
Packet 2:
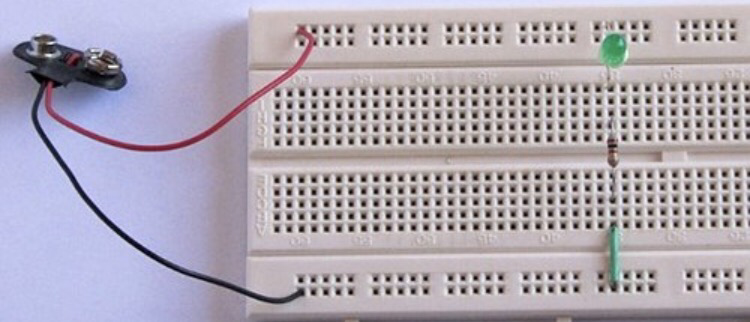
In the second packet we started using breadboards. Breadboards size everything down and keeps it more organized. We started using LEDs, wires, potentiometers, and more.
In the second packet we started using breadboards. Breadboards size everything down and keeps it more organized. We started using LEDs, wires, potentiometers, and more.
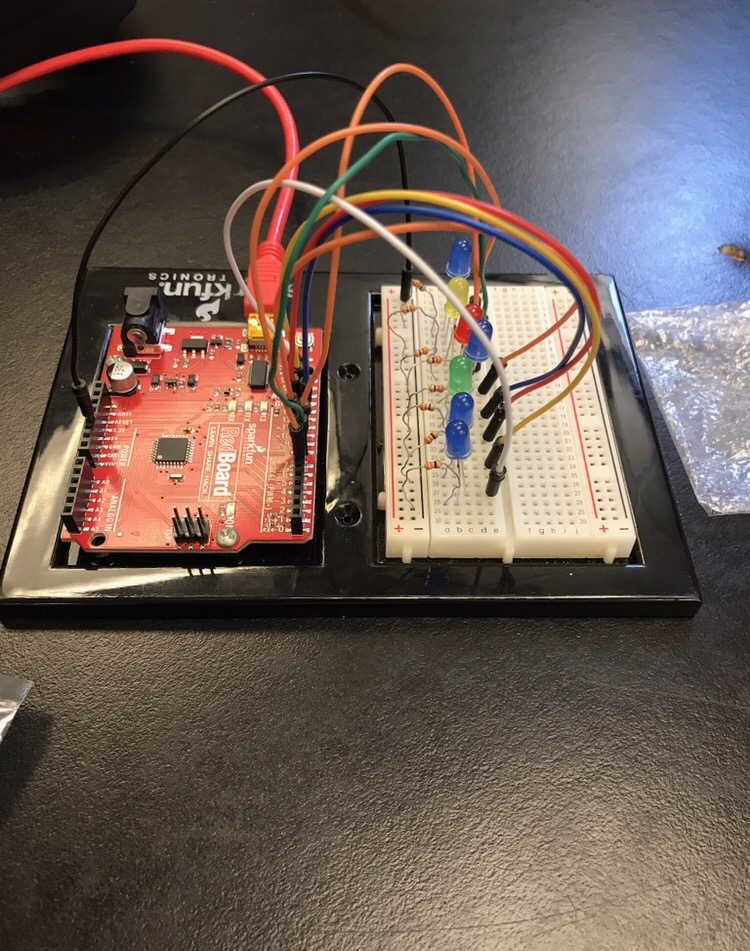
Arduino: Then we got started on Arduino. Arduino is a computer program that lets you program your own circuits on a breadboard. When you connect the computer to the breadboard you can then make your own stuff.
Robot Art Show:
For my robot art design project I made a simple light show. We used Arduino which is a coding program that lets you do a lot of things. You hook up the computer to the red board to connect the two. The lights turned on going up the line and then back down. I was far behind in this project because of absences so I had to learn all the basics of coding in about 3 hours and make my project. Others made cooler things like games or songs but with the time I had I think I did and alright job.
For my robot art design project I made a simple light show. We used Arduino which is a coding program that lets you do a lot of things. You hook up the computer to the red board to connect the two. The lights turned on going up the line and then back down. I was far behind in this project because of absences so I had to learn all the basics of coding in about 3 hours and make my project. Others made cooler things like games or songs but with the time I had I think I did and alright job.
Code:
voidsetup()
// put your setup code here, to run once:
{pinMode(13, OUTPUT);
pinMode(12, OUTPUT);
pinMode(11, OUTPUT);
pinMode(10, OUTPUT);
pinMode(9, OUTPUT);
pinMode(8, OUTPUT);
pinMode(7, OUTPUT);
pinMode(6, OUTPUT);
}
void loop()
// put your main code here, to run repeatedly:
{digitalWrite(13, HIGH);
delay(100);
digitalWrite(12, HIGH);
delay(100);
digitalWrite(11, HIGH);
delay(100);
digitalWrite(10, HIGH);
delay(100);
digitalWrite(9, LOW);
delay(100);
digitalWrite(8, HIGH);
delay(100);
digitalWrite(7, HIGH);
delay(100);
digitalWrite(6, HIGH);
delay(100);
digitalWrite(6, LOW);
delay(100);
digitalWrite(7, LOW);
delay(100);
digitalWrite(8, LOW);
delay(100);
digitalWrite(9, LOW);
delay(100);
digitalWrite(10, LOW);
delay(100);
digitalWrite(11, LOW);
delay(100);
digitalWrite(12, LOW);
delay(100);
}
Reflection:
During this project I missed a lot of days so i was behind on the project. This meant I had less than a week to learn coding and how to use Arduino. Also when i was out my partner left me so I had to do it all by myself. I overcame these challenges and ended up getting my project done. My presenting of the project wasn't well thought out which made the presentation kind of bad. I also forgot to do my circuit diagram. I want to improve on these things and have a better project next time.
During this project I missed a lot of days so i was behind on the project. This meant I had less than a week to learn coding and how to use Arduino. Also when i was out my partner left me so I had to do it all by myself. I overcame these challenges and ended up getting my project done. My presenting of the project wasn't well thought out which made the presentation kind of bad. I also forgot to do my circuit diagram. I want to improve on these things and have a better project next time.
